Instructions for installing Windows on Vultr
Windows on Vultr is a popular operating system and has an easy-to-use UI, but to install it on vps is very difficult because there is no driver for the drive, this article will guide you how to install windows on vultr’s vps.
Upload ISO to Vultr
Use the link attached at the end of the article to add the iso file to your Vultr account. Or you can go to the Upload ISO link – Vultr.com and log in with your account.
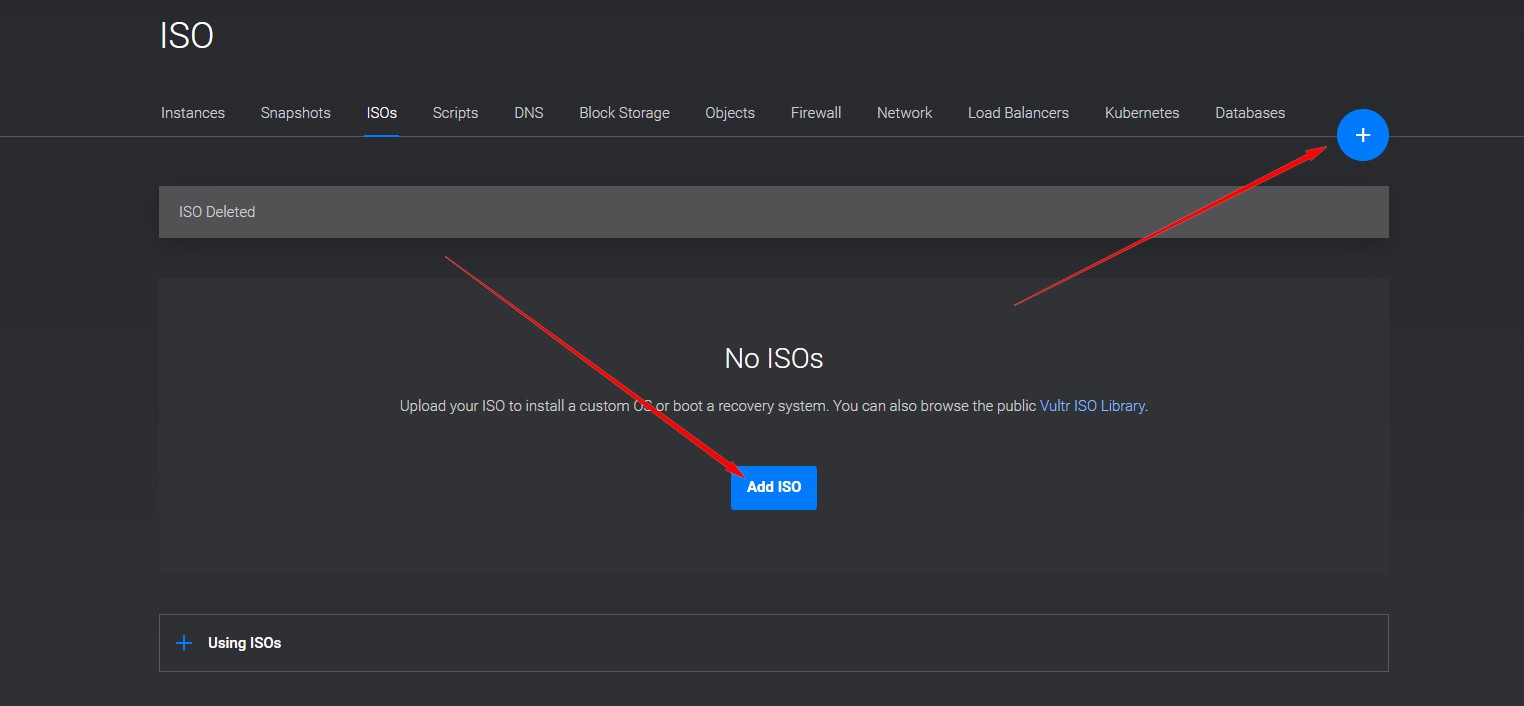
Here, you can click on the blue Plus (+) sign or click on Add ISO to proceed with adding a new ISO file to your account.
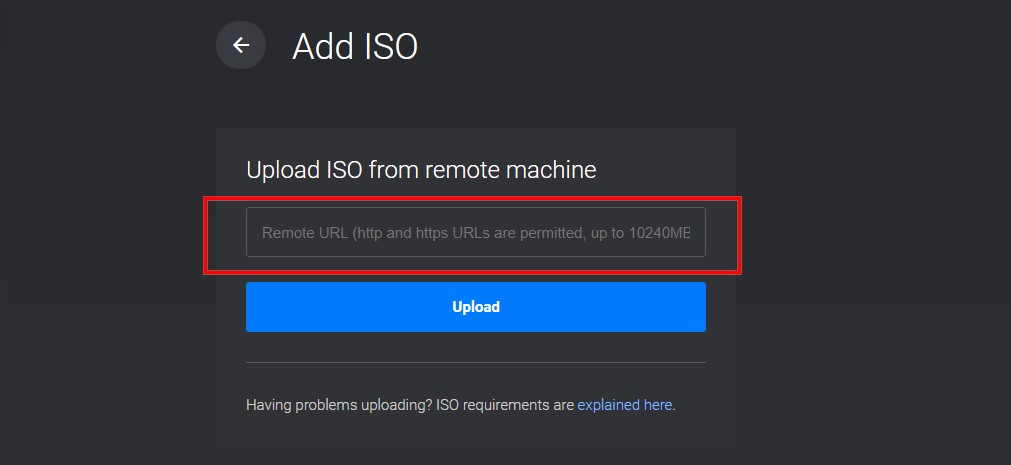
In the next step, paste the path you receive depending on the operating system version below the article.
The upload will take a few minutes, please be patient and wait, during this time you can do what you like except tap the delete button
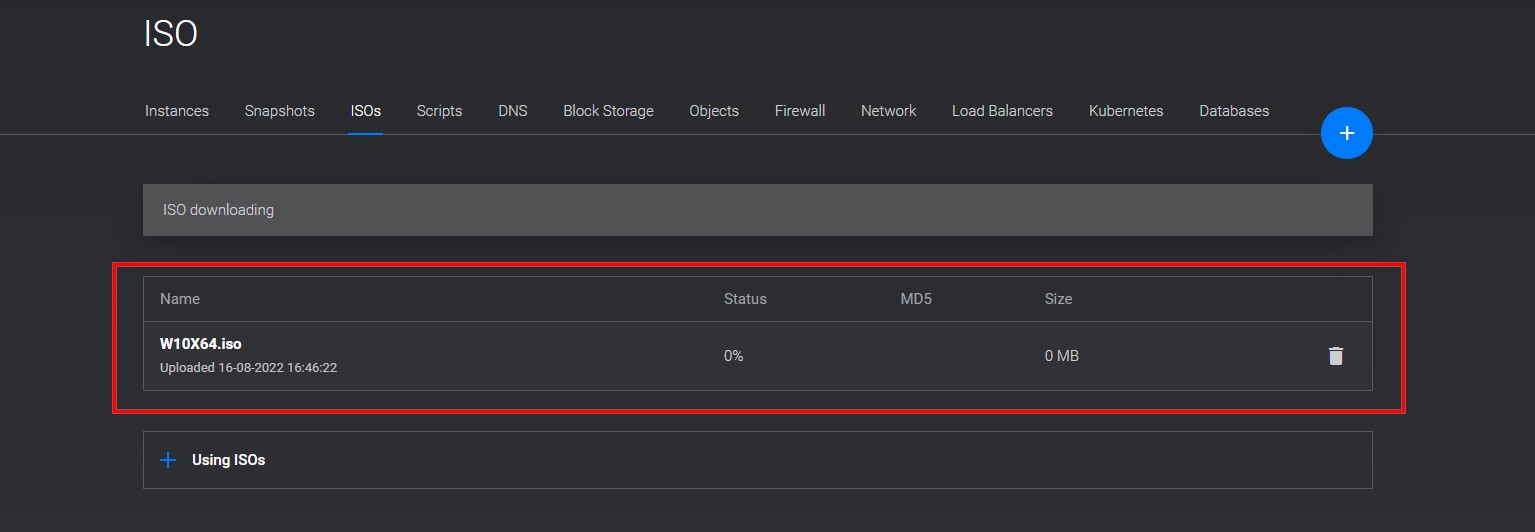
Once the upload is complete, the iso file will be ready for you to use.
Create VPS
After your ISO is ready to install, go to Deploy Servers – Vultr.com to create a vps. In the OS selection step, switch to the Upload ISO tab and select the ISO file you uploaded.

Please choose the appropriate configuration for your VPS to run most stable, we recommend the optimal configuration below, please consider carefully and choose accordingly!
Setting
After deploying your custom ISO, open the Vultr Web Console.

At first, no drives were present. This is normal. Click “ Load Driver ”.
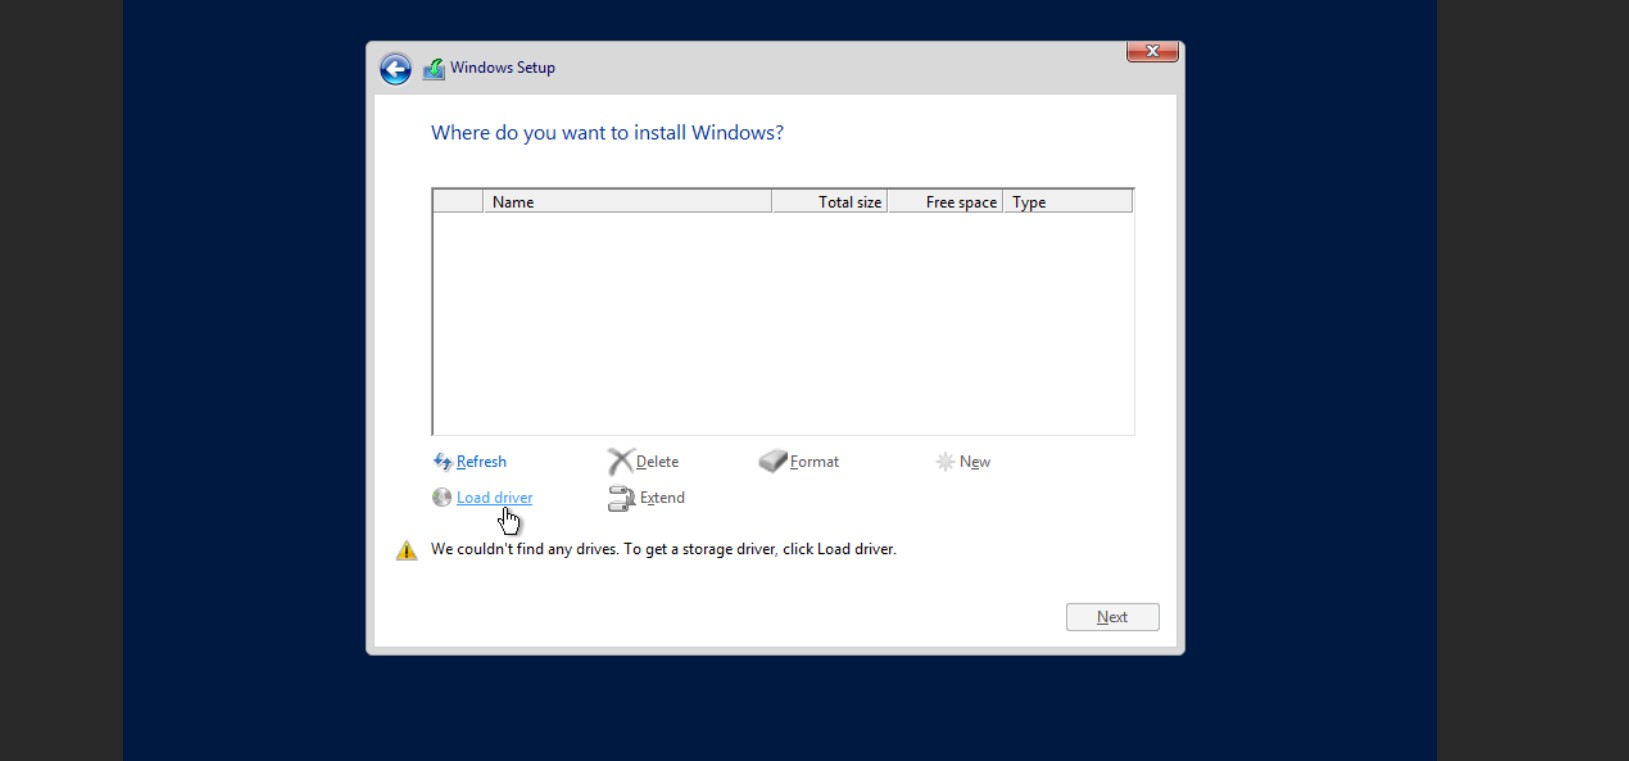
Browse to one of the following folders (varies depending on your ISO image):
- drivers > virtio> WIN8> AMD64
- drivers > Virtio> Virtstor> Win2012> AMD
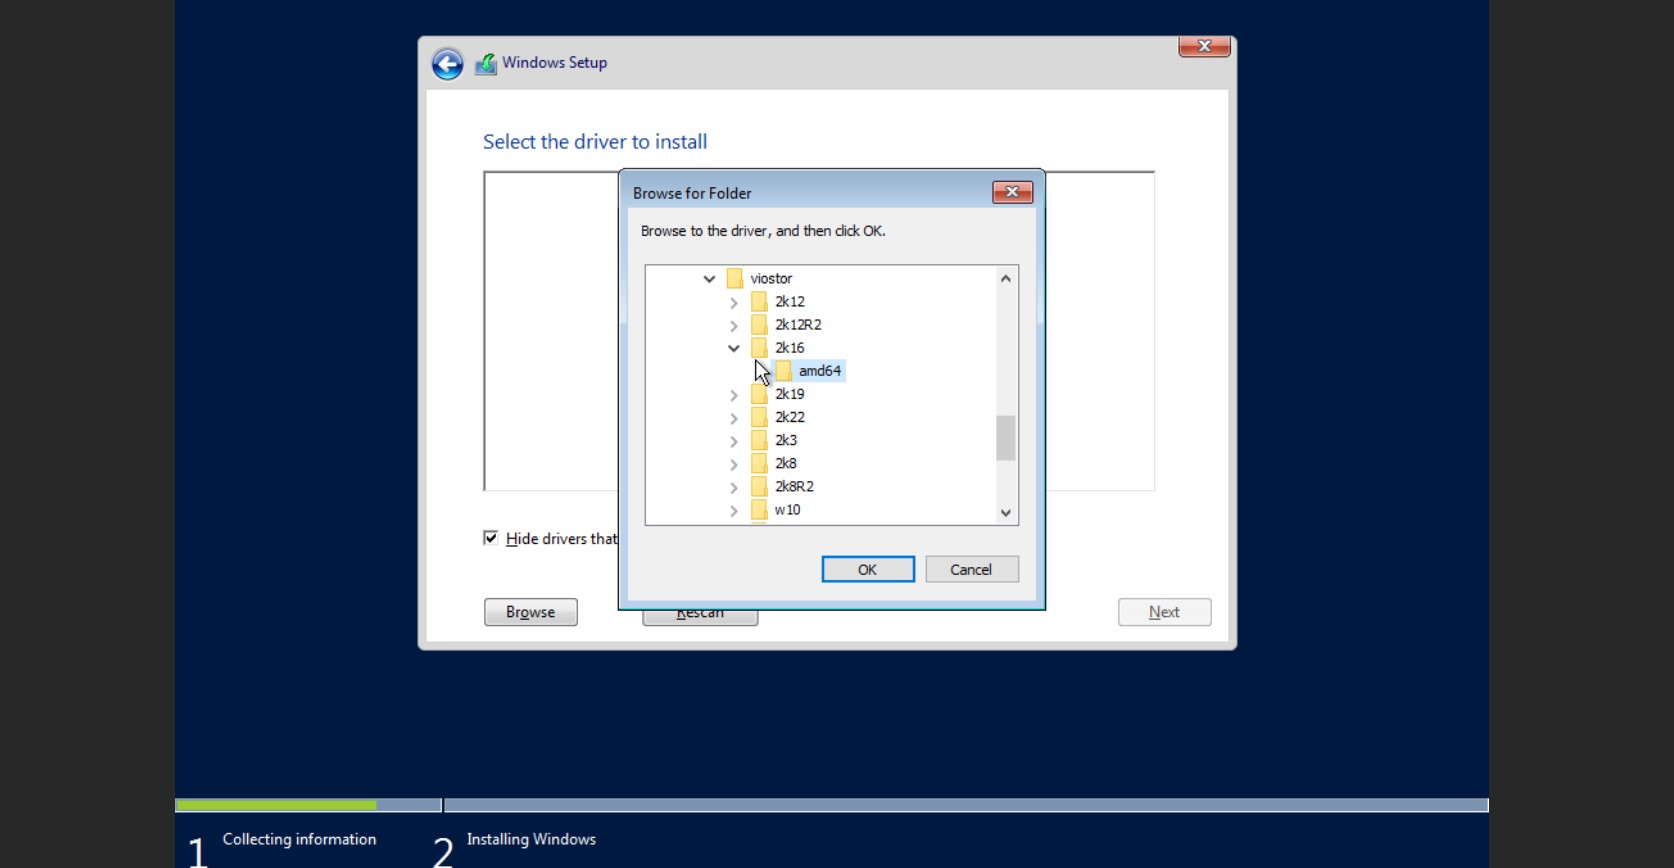
Select the “Red Hat VirtIO SCSI” driver.
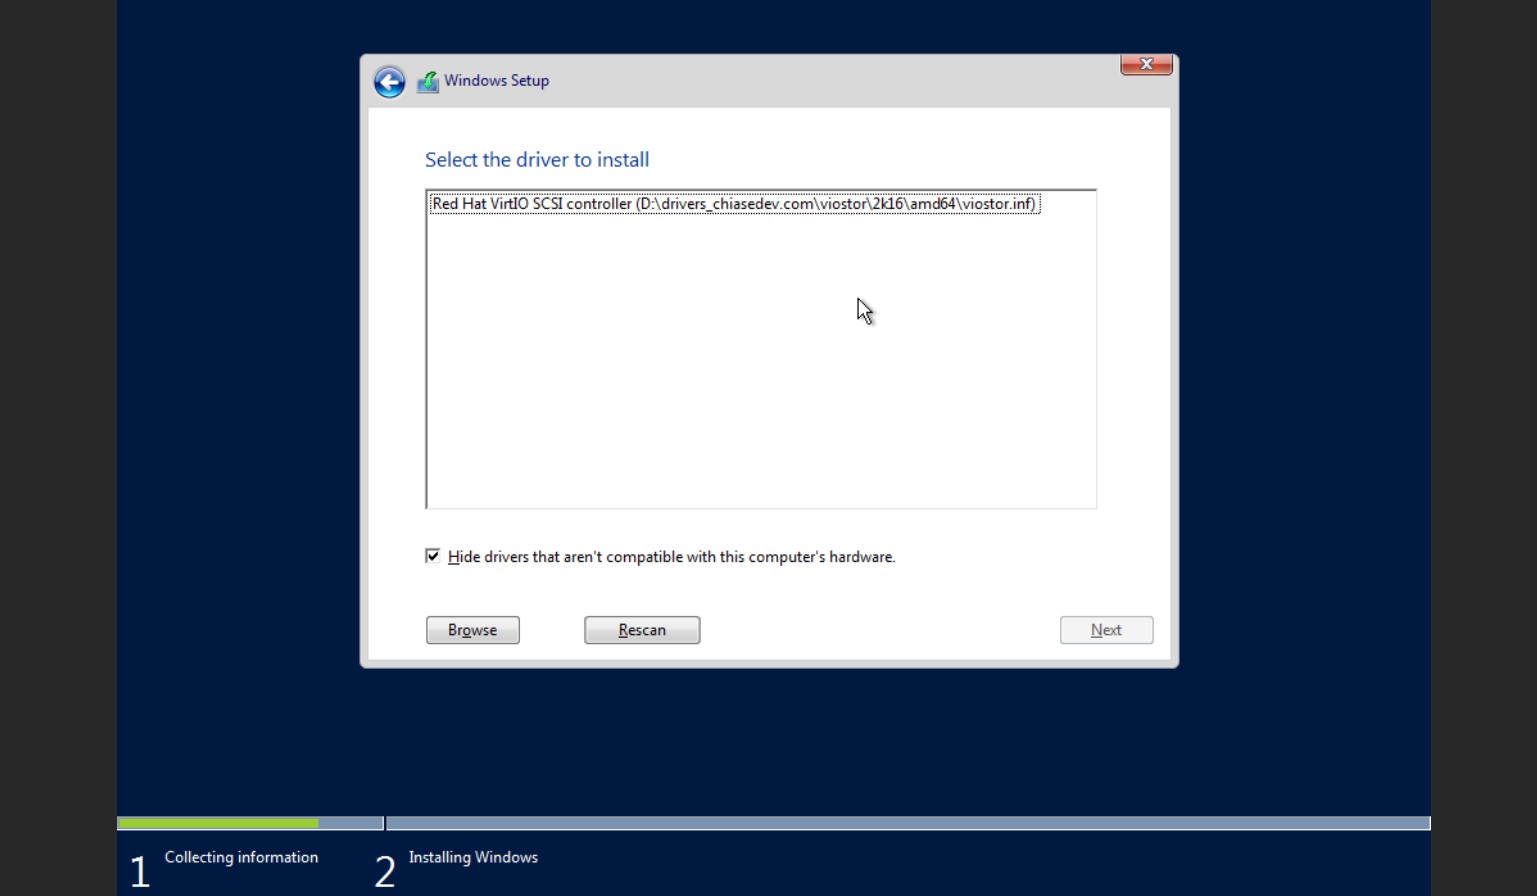
Now the drive is visible.
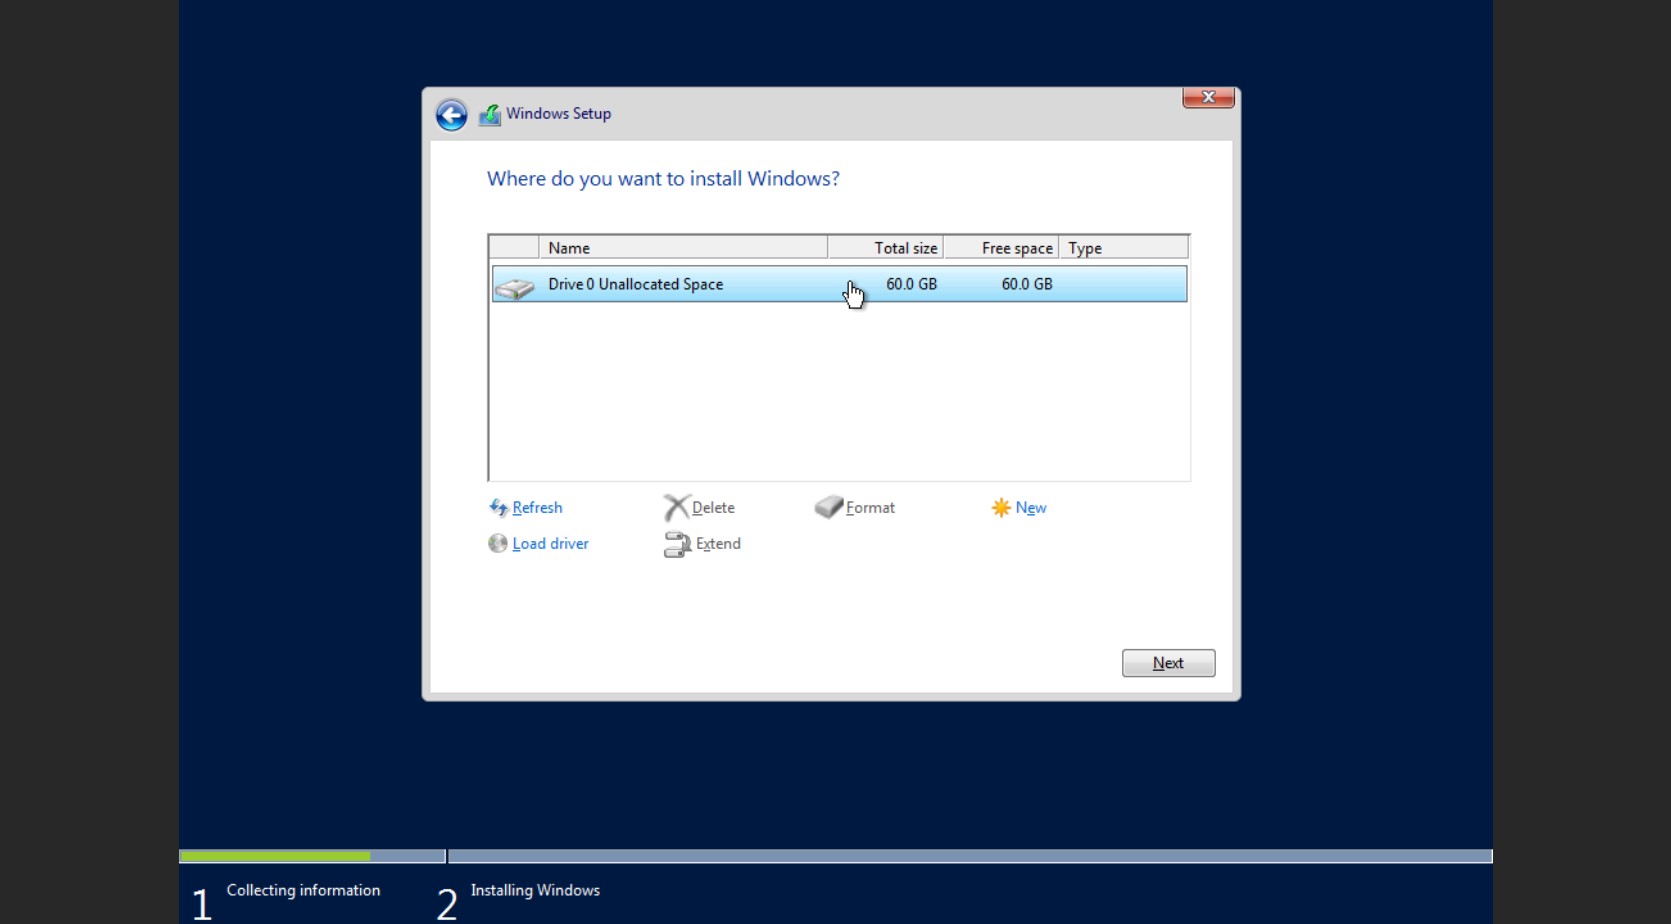
At this point, you can install your Windows normally like many previous windows installs!
Additional steps in Instructions for installing Windows on Vultr
Configure network connection
By default, your VPS cannot connect to the network, follow these steps to configure the network for VPS:
- After you log in for the first time on your Windows VPS through the Console, you will be greeted by the Server Manager . In the upper right part of the menu, click Tools and then select Computer Management . A new window will open.
- On the left pane of that new window (which will be named Computer Management ), select Device Manager .
- You will notice 3 devices marked with a yellow “!” sign (4 if you choose to enable Private Networking ).
Right click on the Ethernet Controller and select Update Driver Software… - Two options will appear, choose one below, which is Browse my computer for driver software .
- Click Browse… and go to D:\virtio\NetKVM\WIN8\amd64 , then click Next .
- You will see a confirmation pop up to verify that you want to install the Red Hat VirtIO Ethernet Adapter , just click Install .
- Your VPS should now have an internet connection! Repeat steps 3-6 for any more Unrecognized Devices
steps on your system.
Enable Windows RDP (optional)
By default, Windows Server will allow two concurrent RDP sessions. Make sure the Windows firewall allows Remote Desktop from the Internet.
- Navigate to Control Panel > Windows Firewall > Allowed Apps
- Verify Public is selected for Remote Desktop .

Instructions for installing Windows on Vultr – If you need more than two concurrent RDP sessions, install a Remote Desktop Session Server. This requires additional permissions .
- Click Manage , then select Add Roles and Features .
- It’s safe to keep clicking Next until you get to its Server Roles section.
- Scroll down a bit and find Remote Desktop Services , click the checkbox next to it to select it. Then click Next .
- You can skip the Features section for now, so just click Next
- Now Role Services , click the checkbox next to Remote Desktop Session Host .
- A pop-up will appear, just click Add Features , then click Next one last time.
- Confirm your installation by clicking Install. Your VPS should now have Windows RDP installed .
- After the installation is finished, you can restart your VPS to apply the changes. And you’re done! You should now be able to connect to your VPS via Windows RDP , using the IP Address , User name (default is Administrator) and Password .


